Tutorial for Fused Glass Plate — Step #8

Fused Glass Plate

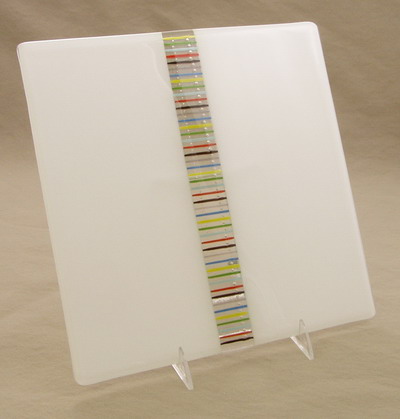
Step #8:  Your fused glass plate isn’t quite finished like I said it was going to be in Step #7.  Right now, you have a flat piece of glass.  I forgot you still need to slump this fused glass plate into a plate mold.  Just a minor detail  😉

The above picture shows the fused glass plate after it was fire polished during Step #7.

In Step #1, I told you I would be slumping mine into a 12″ by 12″ Slumper Mold.  After cleaning the glass very well, put it on the mold you have chosen.

The following is my firing schedule for a slump:

400  750  15

600  1250  15

9999  960  1.30

150  700  0.01

See Step #5 for more information about my firing schedules: https://glassart.wordpress.com/2009/06/04/tutorial-for-fused-glass-plate-step-5/.

This will be the final firing for your fused glass plate.  Let me know how yours turned out!

Christine — Glass Artist

.

Click here to see more of my Fused Glass Art: www.mastersglassart.com

.
Tutorial for Fused Glass Plate — Step #7

Fused Glass Plate

Step #7:  After you fuse your glass plate, you probably need to grind the edges.  This fused glass plate needs to be ground at the corners, because the clear glass flowed over the white glass.  I will grind all the edges with my Diamond Max grinder.  It has a disc that is 6 inches in diameter.  This type of grinder is not the best thing to use for this large fused glass plate, but it is the best tool I own at the moment.  A lap grinder is one tool that would work better.  There are other tools that will do the job, too.

When the edges are ground and the fused glass plate is square, it needs to go back in the kiln for a fire polish.  I use the same schedule as the full fuse, except I only heat the kiln to 1400 degrees.

See Step #5 for more information about my firing schedules: https://glassart.wordpress.com/2009/06/04/tutorial-for-fused-glass-plate-step-5/.

The following is my firing schedule for a fire polish:

400  750  15

600  1000  15

600  1400  15

9999  960  1.30

150  700  0.01

Now you need to wait patiently for your fused glass plate to fire polish, because your new fused glass plate should be finished.

Christine — Glass Artist

.

Click here to see more of my Fused Glass Art: www.mastersglassart.com

.
 

Tutorial for Fused Glass Plate — Step #6

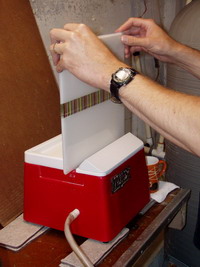
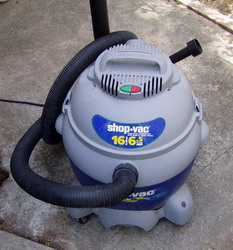
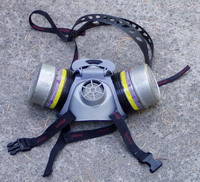
Step #6:  The Fused Glass Plate is fused.  Before you take the fused glass plate out of the kiln, you need to do a couple of things.  When thin fire paper is fired, it disintegrates and turns into a powder.  It is not healthy to breath these tiny fibers, because they will remain in your lungs and could cause problems.   If you used thin fire paper like I did, you will need to vacuum the thin fire paper with a shop vac that has a hepa filter.  You also need to  wear a respirator with hepa filter, so you don’t breath in the dust from the thin fire paper.

After you vacuum up all the thin fire, wash the fused glass plate to remove any remaining thin fire.

If you used kiln wash on the shelf, you don’t have to worry about this step.

Fused Glass Plate -- Hepa Filter for thin fire paper

Fused Glass Plate -- Hepa Filter

Christine — Glass Artist

.

Click here to see my Fused Glass Art: www.mastersglassart.com

.


Tutorial for Fused Glass Plate — Step #5

Step #5:  I am going to discuss the firing schedule for this fused glass plate.

** Remember that all kilns are different, even the same kinds of kilns are different.  The heating elements can heat differently in the same kiln.  The point I am making is to test your kiln, so you know how it works for different firing schedules.

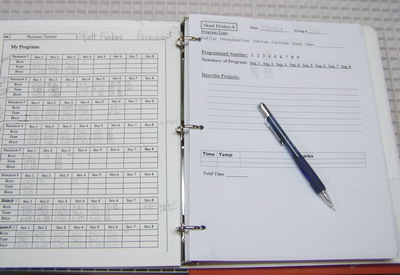
Fused Glass Plate -- data sheets

I have made a data sheet for every firing I do in my kilns  (the data sheet is on the right side of the picture).  I keep detailed notes of the firing schedule, the types of glass, the sizes of glass, and any other pertinent info about the glass.

The data sheet on the left side of the picture came with my Skutt 1414 kiln.  It keeps track of the firing schedule that is programmed into each of the six programs available.  I have expanded this data sheet to include all the different firing schedules I use, since I use more than six.

Now, back to the firing schedule for this fused glass plate.  I will be fusing this glass plate in my Skutt 1414 kiln.  The following is my firing schedule:

400  750  15

600  1000  15

600  1470  15

9999  960  1.30

150  700  0.01

This is not set in stone.  I just wanted to tell you what firing schedule I use, so it gives you some idea of where to start.  Other people will have different firing schedules and may disagree with mine.

If you have a different firing schedule, I would LOVE to hear from you.  I am always willing to learn new things.

Christine — Glass Artist

.

Click here to see more of my Fused Glass Art:  www.mastersglassart.com

.
Tutorial for Fused Glass Plate — Step #4

Fused Glass Plate

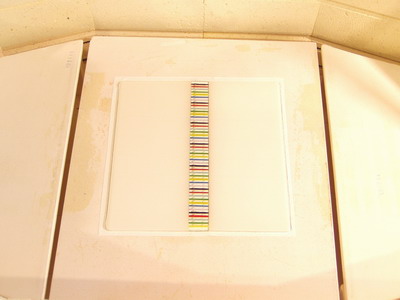
Step #4 for this Fused Glass Plate:  Put the different glass pieces into the kiln.  I have cut a piece of thin fire paper a little larger than the glass pieces and put it on the shelf to protect it from the glass.  Another option is to add kiln wash to the shelf.  If neither of these things are done, then the glass will stick to the shelf forever 🙂

When I am fusing separate pieces of glass together, like the two pieces of white glass and the clear strip of glass with stringers, I always put the pieces on the bottom and put a whole piece of clear over the top.  This way the separate glass pieces fuse together better.

Next thing is to turn the kiln on.  I will discuss the kiln schedule in the next step.

Christine — Glass Artist

.

Click here to see more of my Fused Glass Art: www.mastersglassart.com


.